Zoom: Set Up Synchronous Session
Follow this process to set up a schedule a live, synchronous session for your online class per the updated Teaching Requirements.
Video Userguide
Video not loading? Watch on Youtube.
Table of Contents
Instructions
Creating the Zoom Meeting
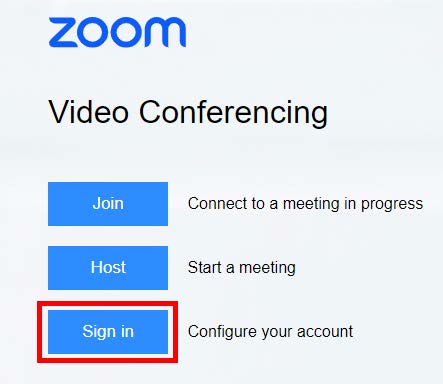
- Go to https://jwu.zoom.us/ and click SIGN IN. You may be asked to log in with your JWU username and password if you have not used Zoom in the past.
- Click Schedule (link or button).

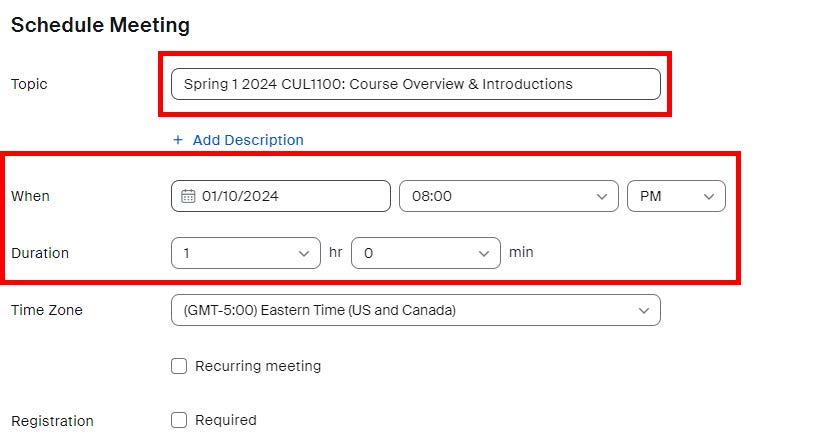
- Provide a topic name that is unique to your course and semester, e.g. “Spring 1 2024 CUL1100: Course Overview and Introductions” and the start date of the session, including time and duration.
- Uncheck the Waiting Room box, and set both Host and Participant Video to “on.” Leave all other settings as is. Click the “Save” button.
NOTE: This will allow your students to “drop in” to the synchronous session when it is active without waiting to be added manually. If you wish to use the waiting room function, leave this box checked.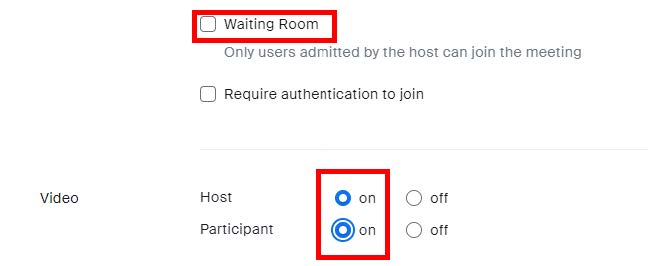
- Your synchronous session has now been scheduled. On the next page, copy (ctrl+c) the invite link. You may also add the session to your personal calendar using the applicable calendar link.

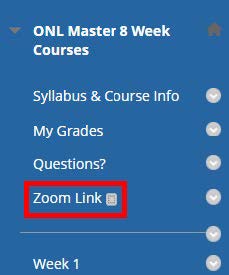
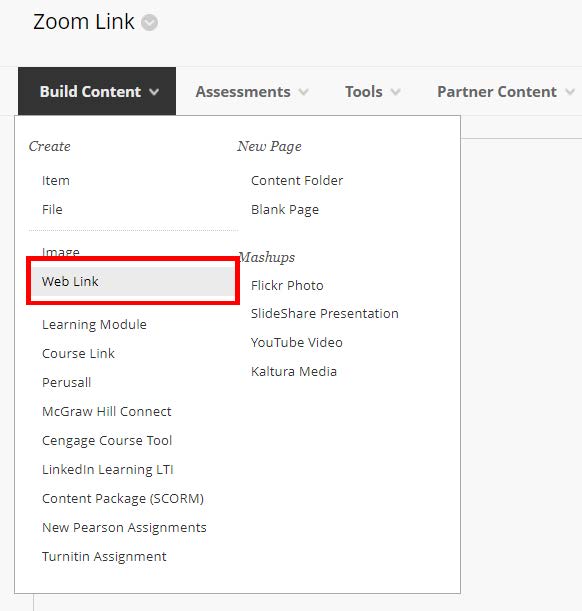
- Navigate to ulearn and access the course you are scheduling office hours for. Click on the “Zoom Link” section in the navigation sidebar.
- Click on Build Content and select the Web Link tool.
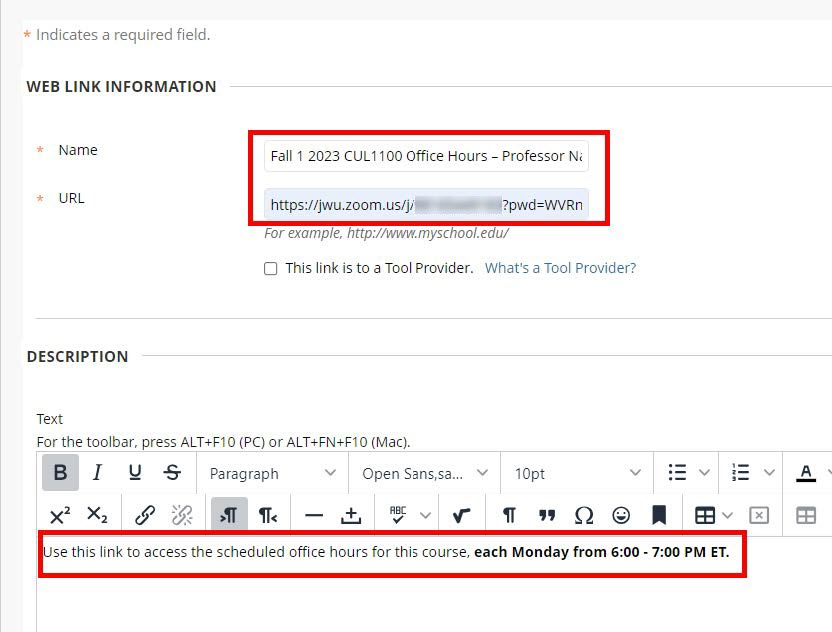
- Edit the link name to match your session name, and paste your invite link into the URL field. Edit the description to include the day/time of your office hours session. Click the “Submit” button.
- Repeat this process for additional sessions as needed. Direct students to the meeting link using a course announcement. Refer to the Create/Edit Announcement User Guide for step-by-step instructions on how to post and send course announcements.
Starting the Session and Recording
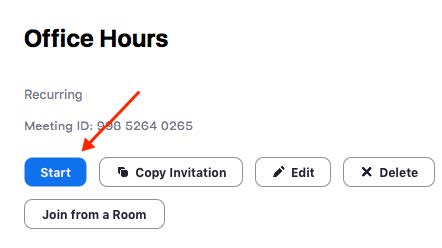
- When ready to begin your session on Zoom, launch the Zoom app or go to https://jwu.zoom.us/ and log in. Under the Meetings tab, locate your synchronous session meeting and click Start to start the meeting.
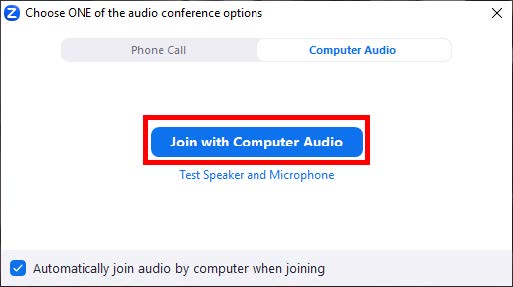
- Click Join with Computer Audio to start the session using your connected camera and microphone. It is recommended to test your equipment in advance.
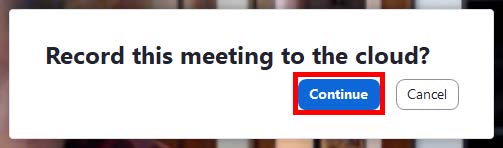
- When you begin the session, click the Record button at the bottom of your Zoom window. Choose Continue when prompted to Record the meeting to the cloud.

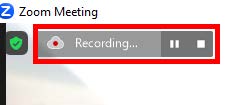
- Recording controls are in the upper left section of the Zoom window. These controls can be used to stop or end recording. Recordings will also end when the meeting is concluded.
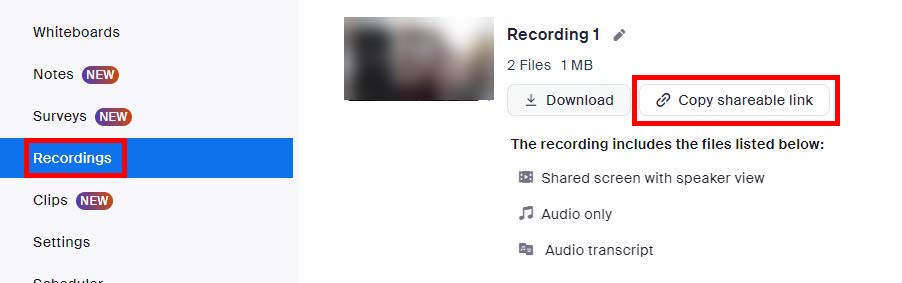
- Recordings will take up to 24 hours to process after the conclusion of the session. You will be notified via your JWU email when the recording is available. Use the link in the notification email to access it on your Zoom account, or log in to Zoom from https://jwu.zoom.us. Click on the Recordings option on the left side of the screen, then click Copy Sharable Link on the appropriate recording.
- Share this link with your students in a Course Announcement. Refer to the Create/Edit Announcement User Guide for step-by-step instructions on how to post and send course announcements.